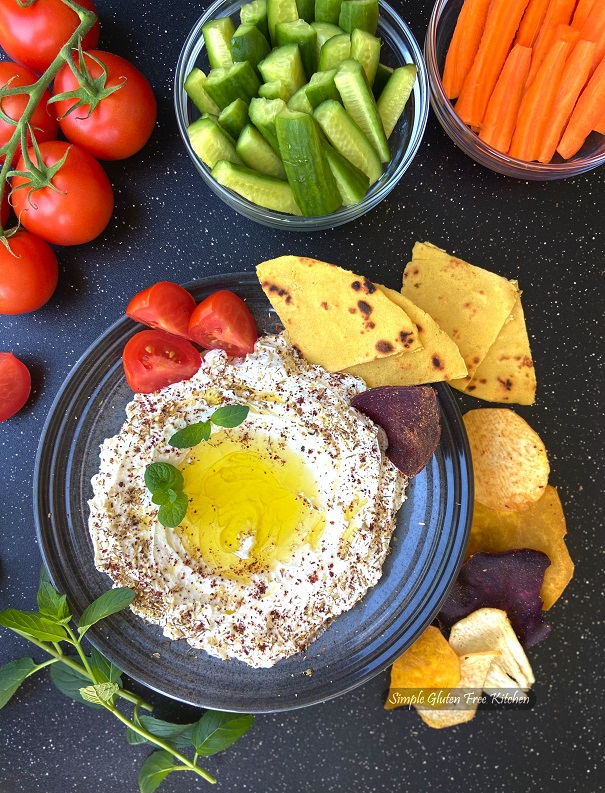
The months of April and May are always one of the busiest months in the garden, with the warmer weather, there’s a ton of gardening tasks to be done, and it’s great just spending time outdoors after being cooped up all winter. My husband was home this weekend to help me with heavy stuff in the yard. So we pretty much worked all day out and for dinner, I made a little labneh platter for us.
Labneh is a middle eastern staple and a favorite in our home. High in protein and rich in probiotics, labneh is really one of the best things ever. It can be used as a dip, a base for sandwiches, in salads, tarts, or pasta. Think of it as whipped cream cheese but with a salty and slightly tart flavor. While you can purchase labneh at specialty grocery stores, it’s so simple and much cheaper to make at home. With a pot of yogurt, cheese cloth, and with little patience you’ll have an unbelievable batch to enjoy!

Labneh is strained either underweight (compression) or by hanging (my preferred method). I provide both methods below. How long the yogurt will strain depends upon what type of yogurt you’re using. I generally leave homemade yogurt prepared with 2 % milk for 24-36 hours [8-12hours (depending on the weather) on the counter and then in the fridge, I have a video of setting yogurt and making Greek yogurt here, you follow the same process only strain it longer.] Straining the yogurt longer develops more flavor and resulting in that cheese like texture. I share a little secret, I actually make fresh labneh (In India we commonly refer to it as hung yogurt) which makes it perfect for sweet and savory uses. I have a sweet recipe posted here, called Shrikhand. For savory purposes, I add salt after all the whey is drained. There is no need to throw the whey. It is full of proteins that you can drink and it is quite tasty. Or you can add it to curry (Not to lentil else it will take hours to cook) or roti and bread dough!
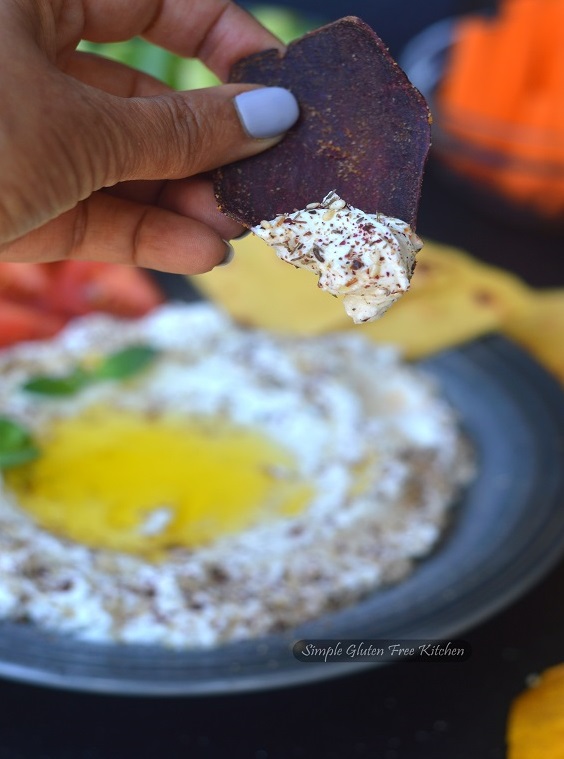
When it comes to pairing, labneh can be served with practically anything. Like I did with warm makki ki roti, beet chips, and, veggies. You can even roll the finished labneh into small balls, and store it in a jar filled with olive oil and herbs. It can also be paired with fruit and nuts.
Ingredients
- 1 l whole milk yogurt (any plain yogurt would work, but I have always made with homemade)
- salt (approx. 1/4 tsp. per cup of yogurt)
- 1-2 garlic clove, finely minced
- Extra virgin oil for drizzling
- Mint leaves or herb of your choice
- Za'atar, fresh black pepper, or red pepper flakes, Aleppo, sumac, garlic powder
- or lemon zest, chopped sun dried tomatoes, sliced olives
- Makki ki roti, gluten free toasted baguette, GF crackers, veggies, GF pita
Instructions
- Line a strainer with a thick cheesecloth and set over a bowl.
- Mix the yogurt with the salt and scrape it into the cheesecloth lined strainer ( I usually skip this step and add salt to labneh while plating).
- Cover with plastic wrap to prevent any air from entering into the yogurt.
- To compress, set a pot lid slightly smaller than the colander’s diameter on top of the cheese cloth-covered yogurt.
- Leave it on the counter for 24-36 hours depending on your desired thickness and the type of yogurt used In summer I usually drain on the counter for 6-8 hours then move the appratus to fridge for the remaining time).
- Once strained, store in the container in the fridge until you're ready to eat.
- Create a hanging apparatus (my preferred method, if you have a nut bag it will be much easier).
- Pour the yogurt into the cheese cloth placed in a bowl. Tie the corners of the cloth up over a wooden spoon to form a pouch.
- Hang the wooden spoon suspending the yogurt over a tall container to catch the whey.
- Follow steps 5 and 6 to complete the process.
- In a shallow bowl or plate, place several spoonfuls of the labneh (at this point add salt if you haven't added while straining).
- Also mix in mined garlic. Smooth out labneh and create a ‘crater’ in the center. Drizzle olive oil. Sprinkle some zaatar, sumac, black pepper, garlic powder, mint leaves and your choice of toppings.
- Serve it with any type of cracker, chips, veggie you have on hand. I paired it here with makki ki roti, beetroot chip and crudites.
angiesrecipes
I love lahneh. It’s easy to make and so creamy and delicious.
Breadandsalt
We all love lahneh! This post is so useful. Thank you so much.
Judee
One of our absolute favorites. I used to make it, but now we have a store near by that sells the best Labneh. .. Love your recipe.
Laura
I’ve purchased labneh not knowing how simple it is to make! I need to give this a try for sure – thanks for the recipe!
evi erlinda
This labneh looks so great and tasty!
I just knew how to make it 🙂 Pretty simple and I need to give it a try. Thank you for this recipe, Balvinder!
Raymund
I love a good labneh, definitely one of my favourite dips, and your recipe looks amazing
John / Kitchen Riffs
Love lahneh! And although I rarely make it, it’s an easy process. Gotta start making my own again! Thanks for the inspiration. 🙂
2pots2cook
So easy to make, so tasty with all these vegetables aside ! Beautiful photos too ! 🙂 Thank you !
Easyfoodsmith
My family is a fan of labneh and I love that fact that it comes together so easily and effortlessly.
Archana
Making it right now. Sounds yum.
Balvinder
Wonderful! Let me know how it goes.